Integration strips
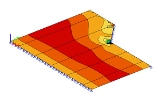
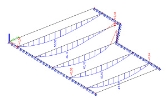
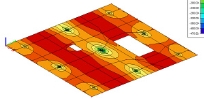
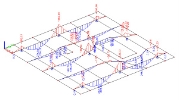
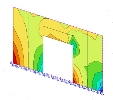
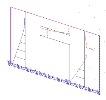
The integration strip is useful when you need to represent results on slabs as on beam members. For example, you may need to display results in a wall like on a column. Another example is a ceiling composed of prefabricated slabs. You need the results per one prefabricated element and treat them as results on a beam. The images below demonstrate some examples of practical application.
The procedure to input an integration strip
1. Start function:
a) either Structure > 2D member > 2D member component > Integration strip,
b) or Results > 2D members > Integration strip.
2. Adjust the required parameters (see below) and confirm with [OK].
3. Select the master plate.
4. Define the starting and end point of the strip. If required, you may input a polygonal strip as well.
Input of a new Integration strip does not delete results. However, if option Create mesh nodes (see below) is ON then both FE mesh and results are deleted after the insertion of a new Integration strip. In this case the user is asked and must confirm that he really wants to delete results and mesh (important especially for big structures).
Properties of the integration strip
Name
This property identifies the integration strip.
2D member
(informative) It contains the name of the master 2D member.
Create mesh nodes
If ON, nodes of the finite element mesh are generated along the strip (the mesh and results, if exist, are deleted).
If OFF, the integration strip is independent on the FE mesh (the mesh and results, if exist, remain intact).
Effective width definition
Width = the width of the integration strip is input directly by the user.
Number of thiknesses = the width of the strip is input by the user indirectly as the multiple of the thickness of the slab.
Constant symmetric = the width of the strip on the left and on the right of the definition line (curve) is the same. The user inputs the total width.
Constant nonsymmetric = the width of the strip is different on the left and right side. The user must specify separately the left and right thickness.
Width / No, of thicknesses
Here the user inputs the actual width of the integration strip. Depending on the Effective width geometry either one (total) or two (left + right) values are required.
Check of geometry
Geometry check is available for the Integration strip. It can detect strips that are fully outside the master slab. Such strips are deleted.
Use function Check structure data. It can be called from service Structure or from service Calculation, mesh.
Constraints
There are no special constraints concerning the input of Integration strip in comparison with ribs.
- overlapping of integration areas is allowed,
- full coverage of slab by integration areas of Integration strips is not required,
- integration areas can extend outside the slab,
- integration areas can overlap with openings,
- integration areas can overlap with adjacent slab(s).
Displaying of Integration strips
Colour + style
Integration strips are drawn using the same pen as for 1D member. It can be adjusted in Setup > Colours / lines.
View parameters
The Integration strip has its own view parameters.
Tab Structure
Centreline
ON = the strip is displayed according to view flag Effective width
OFF = the strip is not drawn
Effective width
No = only the definition line of the strip is displayed
Wired = only the contour of the strip is drawn
Rendered = the strip is rendered
Tab Labels
Display integration strip label
ON = the name of the strip is displayed
OFF = no label is shown
Analysis
When property “Create mesh nodes” is ON then an internal edge is generated automatically along the Integration strip centre-line. Then the mesh is generated in the same way as with an ordinary internal edge.
The integration strip does not have any cross section and does not influence the stiffness of the model.
Results
Results on Integration strips are displayed as results on ribs (1D member results). It is necessary to check checkbox “Rib” to see results along the Integration strip.
Internal forces are integrated from 2D member stresses within effective width (as for ribs).
Resulting 2D member internal forces (not included in Integration strips) can be displayed (as for ribs).
If the checkbox “Rib” is not checked, then zero values will be displayed along Integration strips.
Member stress and code checks
Member stress and code checks are not available for Integration strips.
Engineering report
Integration strip can be inserted into report - table with the definition of Integration strips.
Results on Integration strips are displayed together with other 1D members.
XML
Integration strip can be inserted into XML.

