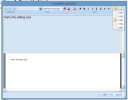
Formatted text
It is possible to use formatted texts in Engineering Report. Formatted text is inserted into a report as report item "Formatted text".
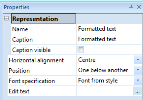
User can specify following options in the properties of item Formatted text:
Name
Property Name is common for all report items and is intended for users orientation. The name identifies the report item in the navigator panel.
Caption
Property Caption is common for all report items and defines the name of the caption of the report item in the report.
Caption visible
This property indicates whether this Formatted text will be displayed in the Table of contents. If the property is switched off the Formatted text follows immediately previous report item.
Horizontal alignment
It influences alignment of the text in the report. The alignment is valid for whole Formatted text. In case user wants to have set of text paragraphs with different alignment he would need to insert separate Formatted texts items for each different alignment.
Edit text [...]
This property button navigates user to Formatted text editor where he can enter his text. Since version 14 it is possible to Start editing of formatted text using double click on preview of formatted text or using button Edit on the ribbon.
Position
See the chapter related to user defined positioning.
Font specification
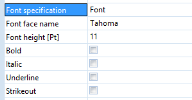
This property is new in version 14.1. It defines which font is used as default for displaying of formatted text.
Font from style - the font Standard defined in the report style is used.
Font from style with specified height - the font Standard defined in the report style is used however the height of the font can be changed in the properties of the formatted text.
Font - the font is completely defined in properties of the formatted text .
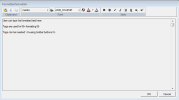
Formatted text editor
The text can be inserted by typing or using clipboard. It is possible to type multiple rows.
Line wrapping in the Formatted text editor is independent on line wrapping in the final report.
The formatting of text is done using predefined tags. Those tags can be typed manually or inserted using buttons on the toolbar. Sub and upper scripts are defined using syntax known e.g. from Tex. This can be inserted also from the toolbar.
User can insert separate tags from the toolbar by pressing some button while no text is selected. Pressing of formatting button in case some text is selected will insert starting tag before selected text and ending tag after selected tag.
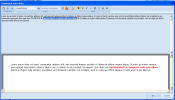
Since version 2013.1 user can see the formatted preview of the text.
Since version 14.1 it is possible to increase / decrease the size of the text in the editing area.
Writing of subscript / superscript
| Subscript | text_{subscript} |
| Superscript | text^{superscript} |
| Both scripts | text^{ superscript}_{ subscript} |
Tags for changing of font
| Switch ON | Switch OFF | According to visual style | Font Property |
|---|---|---|---|
| \B+ | \B- | \B. |
Bold text |
| \I+ | \I- | \I. | Italic text |
| \U+ | \U- | \U. | Underlined text |
| \S+ | \S- | \S. | Strikeout text |
| Switch ON | Switch OFF | According to visual style | Font Property |
|---|---|---|---|
| \A{Font name} | \F- | \F. | Change of font name |
| \D{R;G;B} | \D- | \D. | Change of text color (using Red Green Blue format) |
| \C+{name of char set} | \C- | \C. | Changed of character set |
Tags for special characters
User can also use "& notation" to insert special characters. The list of available characters and notations are listed in appendix. See Ampersand notation.

