Buckling settings overview
The input of buckling-related settings is a very important part of the preparation of the model of the analysed structure. They should be ALWAYS input, or at least reviewed, by the user and it should NEVER happen that application default values are blindly accepted. Moreover, the buckling-data may be affected by defined constraints such as supports, cross-links, linked nodes, hinges, etc. Therefore, the buckling related settings SHOULD be input AFTER all the boundary conditions have been already defined.
The buckling settings represent a rather complex set of data. In order to specify the required buckling-data correctly, it is important to understand the logic of the program. The buckling-data can be specified on two levels.
The levels can be described as:
Buckling settings defined in material setup (project buckling settings)
These default buckling settings are always present, and are applied on every member that uses the default buckling settings (i.e. system length and buckling settings = default). It enables the user to modify the default buckling settings per material in their respective material setup service (e.g. steel setup, concrete settings,...)
Below an example from the steel setup regarding the buckling settings defaults:

More information can be found here: "Project buckling settings"
Buckling settings defined in buckling groups (settings for buckling systems)
Buckling groups (BG) are buckling settings applied on a group of 1D-members that are in the same buckling system (same number of parts + same material). When assigned to 1D-members they overrule the project defaults defined in the material setups. Buckling groups can be created via two possible ways:
- Via System lengths and buckling groups found in the material service (Steel, Concrete,...). Adding it can be done as follows:
Steel (or any other material service)-> System lengths and buckling groups -> New -> Define the material and number of parts -> click on OK
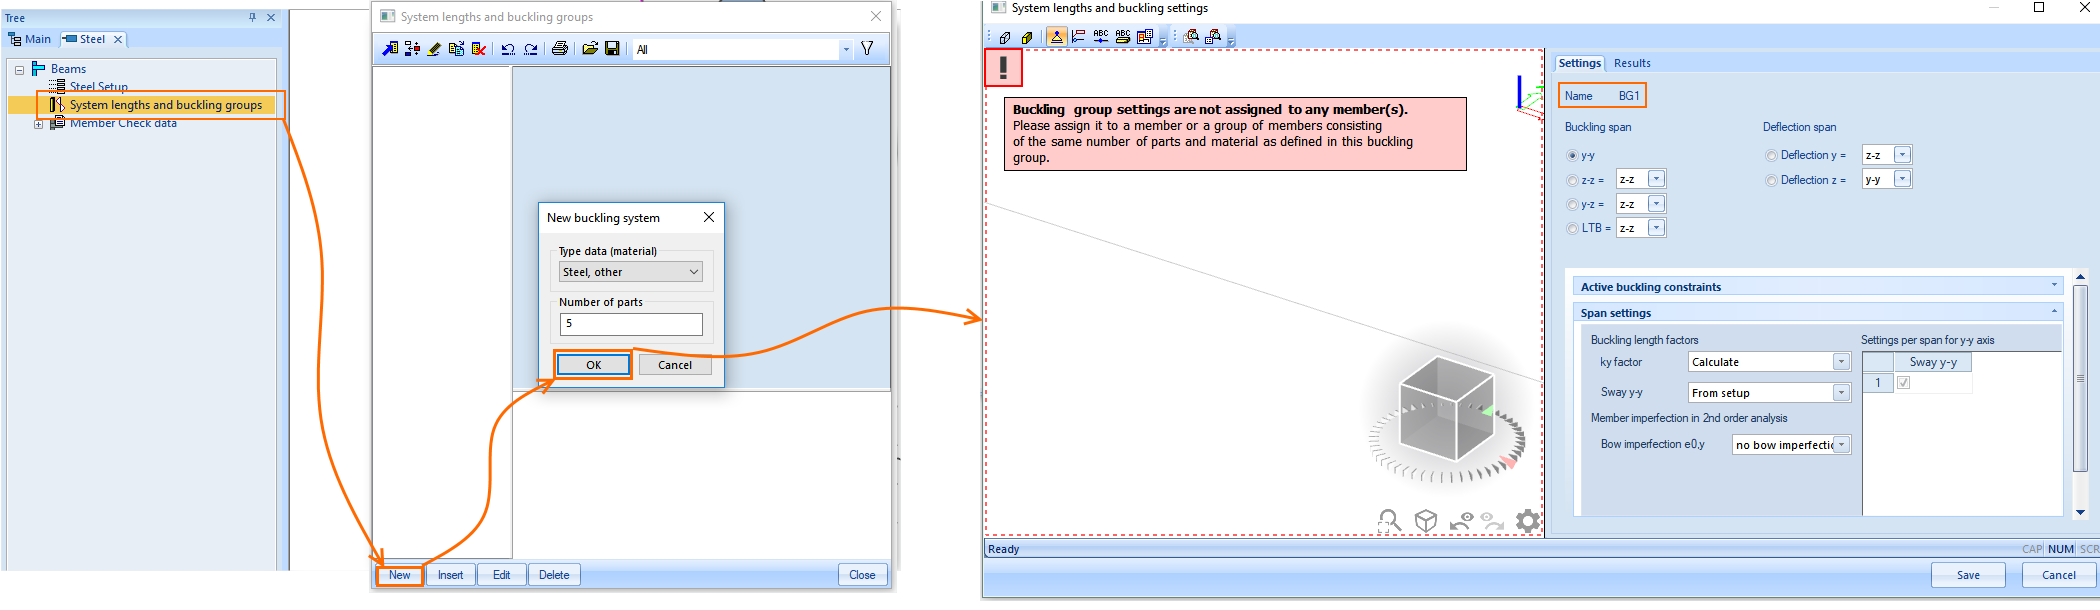
Notice the message in the graphical window indicating that the newly created BG has to be assigned to 1D-members in order to see it in that window. It means that the user needs to select the member within the project (outside this dialog) and assign that buckling group to it via the 1D-member property system lengths and buckling settings.
More information regarding system lengths and buckling groups can be found in "System lengths and buckling groups"
- Via System lengths and buckling settings found in the 1D-member properties IF the default is currently used. The benefit of adding a new BG from the 1D-member property is that it is directly assigned to that 1D-member.
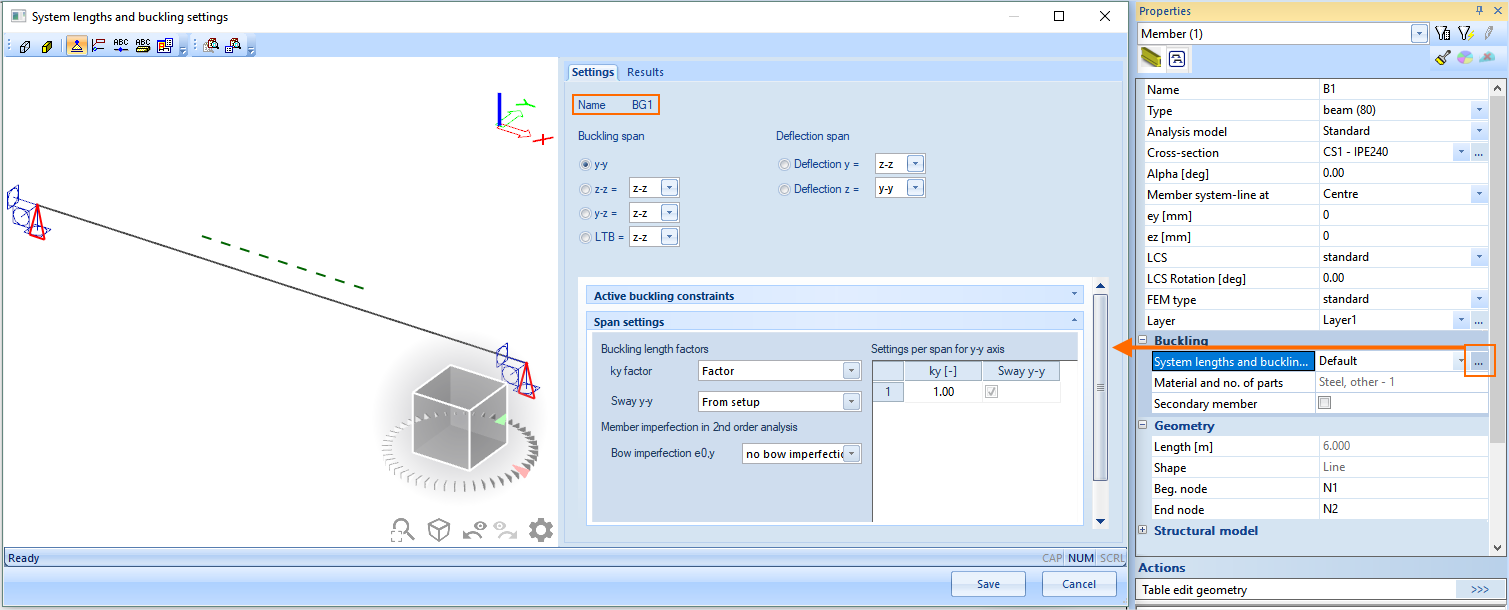
More information regarding system lengths and buckling settings can be found in "System lengths and buckling settings"