Validation of seismic analysis: signature of results
Dynamic analysis troubleshooting > seismic analysis > signature of results
Check the signature settings of signed seismic load cases
Whenever possible, it is recommended to use signed seismic load cases (see "Seismic load case settings").
Use manual selection of the predominant mode
For 3D models, always use manual selection of the predominant mode, as automatic predominant mode selection does not take into account the actual direction of the seismic action.
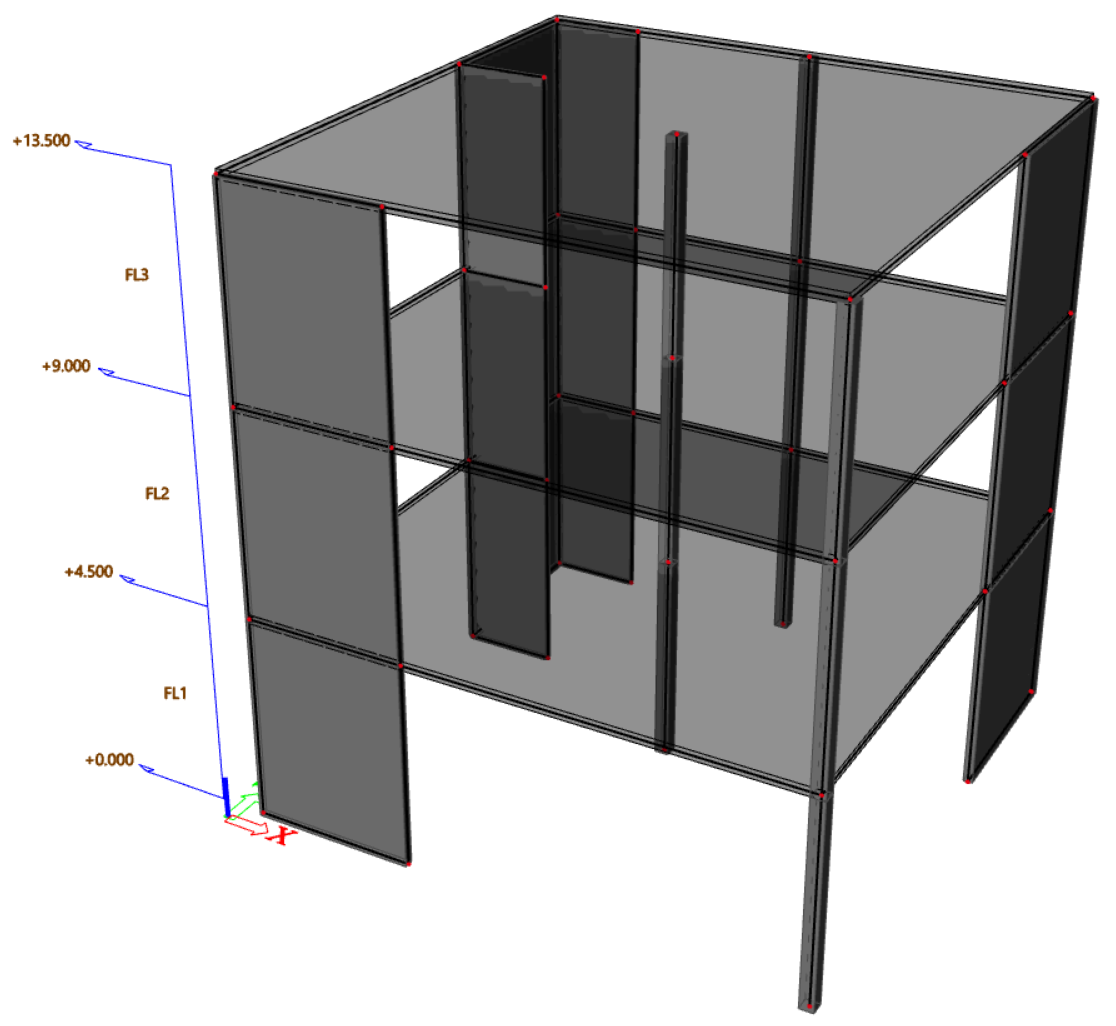
Consider the following simple building and the corresponding modal mass ratios for the first two modes:

According to the obtained values, mode #1 is clearly predominant for direction X and mode #2 for direciton Y.
When using automatic selection of the predominant mode, overall values of the modal mass ratio are computed for each mode. The corresponding values are then 0.707 for mode #1 and 0.538 for mode #2 (using the formula in "Seismic load case settings"). As a consequence, mode #1, having the highest overall modal mass ratio, is used as predominant mode for all seismic load cases.
It is correct for direction X, but not for direction Y.
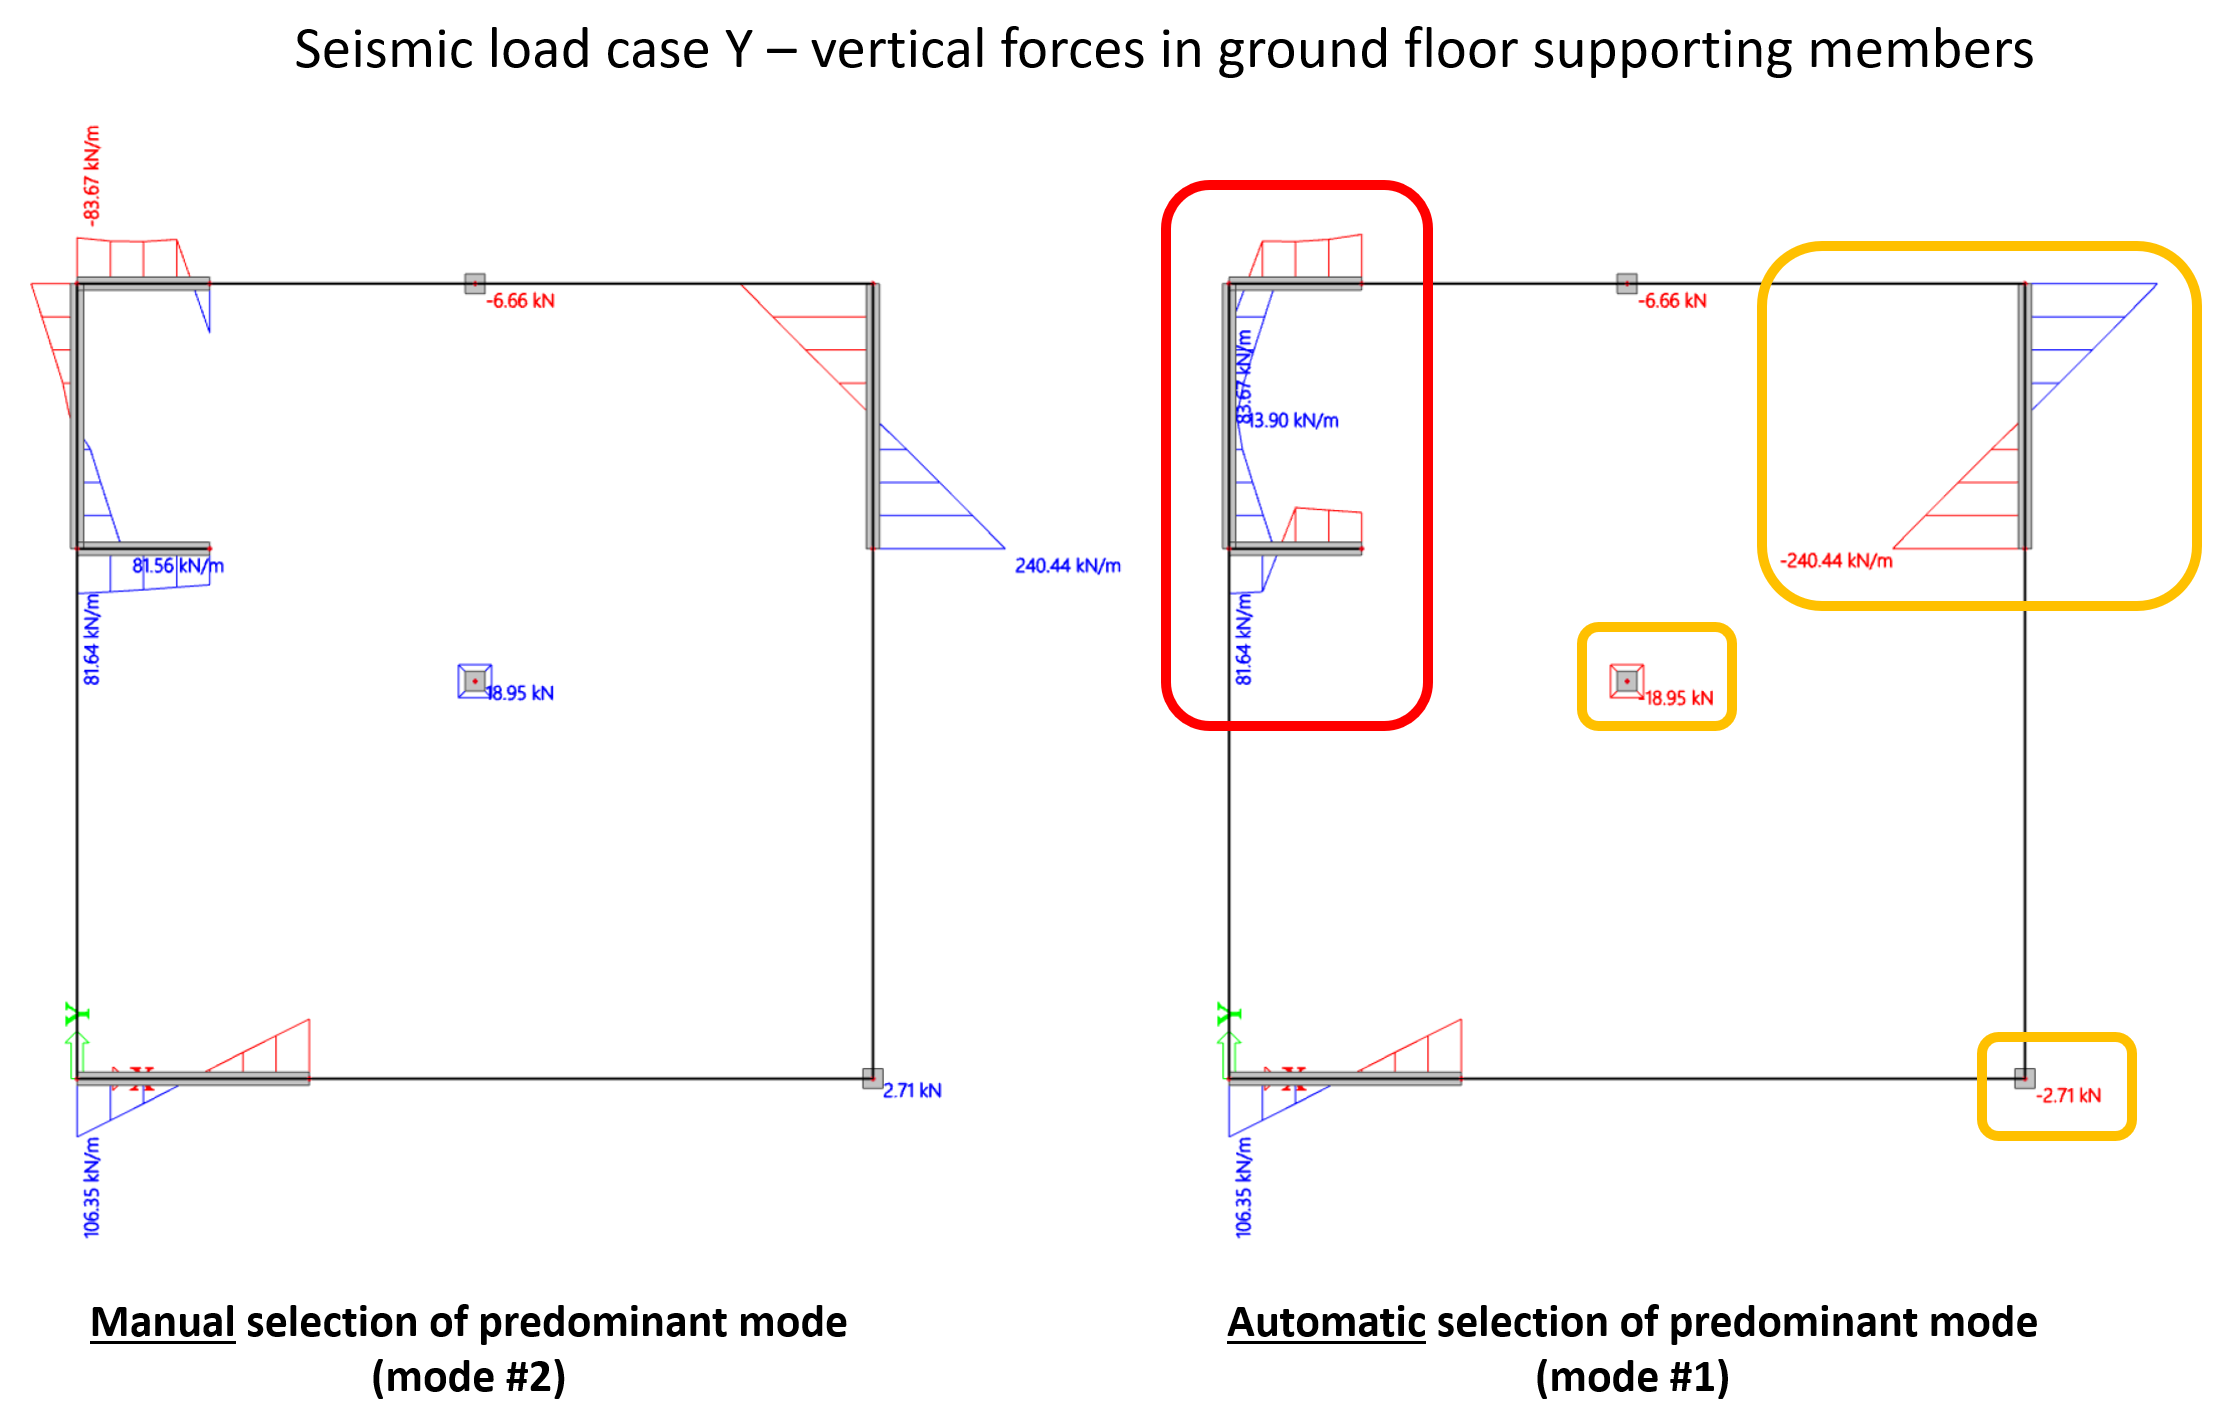
In the picture above, see signed results of vertical internal forces in ground floor supporting members.
On the left-hand side picture, the predominant mode has been selected manually as mode #2, as specified above.
On the right-hand side picture, the predominant mode has been selected automatically as mode #1. The sign of results in the U-shaped core (red frame) is clearly nonsense. For other shear walls (orange frames), results look correct locally, but the sign concomitance between supporting members is broken - this can be detected only by comparing with a meaningful signature of results.
Use a clearly predominant mode
Ensure that the selected mode for signature is clearly predominant. Usually, when one mode has a modal mass ratio that is significantly higher than all other modes, the choice is clear.
As soon as a mode has a modal mass ratio that is more than e.g. half of the maximum value, caution is definitely required.
Consider the following example:

Mode #2 has a modal mass ratio of 43%, which is clearly higher than mode #5 with 27%. However, the difference is not as striking as in the previous example, where the top X mode gathered 71% alone. Already at that point, it is not certain that the apparently obvious choice is the correct one.
Combined with the fact that 3 modes are necessary to reach 82% of cumulated mass ratio, the frequencies of those modes correspond to spectral acceleration values that are very different, as can be seen in the table. Because of that, modes #5 and #8 are contributing more than mode #2 to the total base shear. As a consequence, any of the first 3 modes listed here are valid candidates for result signature.