Dimension lines
Once the general cross-section is defined (or partly defined), it is possible to add dimension lines to the drawing of the section.
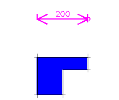
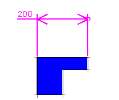
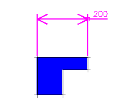
There are three types of drawing lines: (i) vertical, (ii) horizontal, and (iii) general.
The procedure to input a new dimension line
-
Open function Dimension line from the tree menu of the General cross-section editor.
-
If required, change dimension line parameters.
-
Select the first point that the dimension line refers to.
-
Select the second point that the dimension line refers to.
-
Define the position of the dimension line.
-
Repeat as many times as required.
Parameters of dimension line
|
Name |
Specifies the name of the dimension line. |
|
Style |
Selects the style: vertical, horizontal, general. |
|
Label |
Specifies a text label attached to the dimension line. |
|
Plot line offset |
Defines the offset of the plot line from the cross-section. |
|
Plot line |
Selects the type of plot line. |
|
Label alignment |
Defines the alignment. |
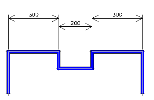
Example of dimension lines


