Step 6: Import the .CLC into the Check Manager
In this specific step, the .CLC file created in the previous Step will be imported within SCIA Engineer.
Launch SCIA Engineer and open the file Manual_Example_1.esa.
Within this example project, three steel members with different cross-sections and materials are given:

Go to the  service.

In the service open the .
.
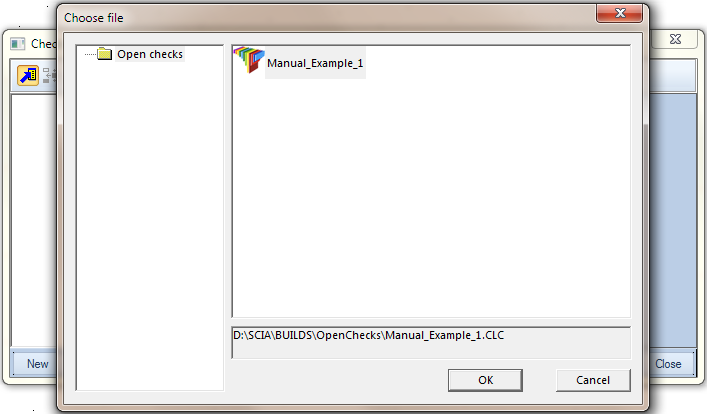
When opening the Check Manager for the first time, it will automatically open a dialog for choosing a .CLC file.
The dialog points to the OpenChecks 'User folder' as defined in the Default folders chapter.
Select the Manual_Example_1.CLC file and press [OK].
As specified in the Default folders chapter, when having multiple CLC files it is possible to structure them using subfolders, for example for different types of checks, materials etc.
In case the folder contains also an .ICO icon file with the same name as the .CLC file this icon will be displayed in the above dialog.
The Check Manager automatically imports the Check header information from the CLC:
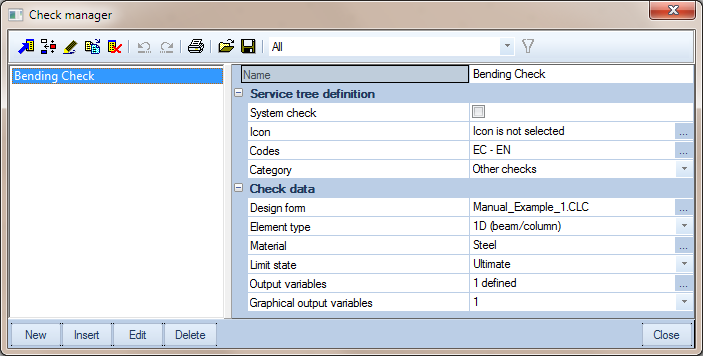
The Name, Codes, Element type, Material, Limit state and Output variables are shown as defined in the CLC in Step 4.
The Check Manager concerns a global repository i.e. it is common for the whole SCIA Engineer installation and thus not for this specific project.
In other words, the Check which was just imported here will be visible in any project opened in this installation of SCIA Engineer.