Tips and Tricks
All changes made in the input table must be accepted by the model geometry.
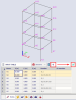
Member moving
The position of a member depends on its nodes. It's possible to edit the position of nodes (coordinates X, Y and Z or ux, uy and uz) and influence the position of the member. It is possible to move multiple members at once. The change can be made via substitution or by using simple formulas.
- Using the substitution >2 to the cells for coordinate X: two columns are moved in y direction;
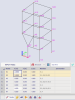
- Add +2 to the cells for coordinate Z: two columns are moved upward;


Renaming and renumbering
As described on the page multi-editbox, the user can rename and renumber names for all kinds of entities.


Rounding values
As described on the page multi-editbox, the user can use the rounding operator to round inaccurate coordinates,...


Zoom to selection + selection link in input table
It is very useful tu use the command "Zoom to selection" (Main menu > View > Zoom > Zoom to selection) together with a selection in the input table.
If you want to locate some entity in a large project, just use the searching or filtering row in the input table, select the entity and use the command "Zoom to selection". The selected entity is nicely located in the model.

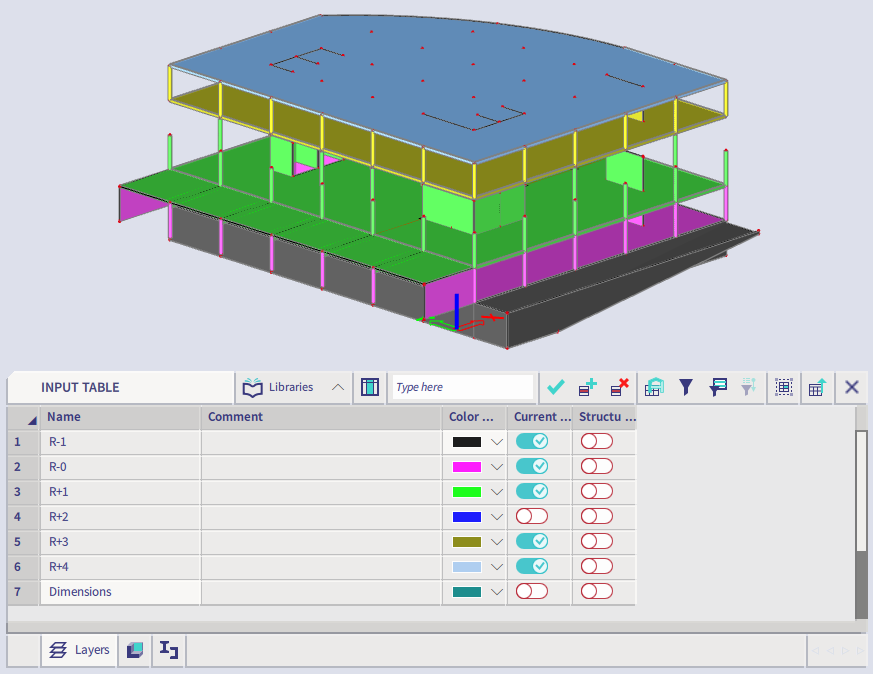
Using tab with layers for visibility
If the user wants to use the visibility by layers, it is very helpful to display the tab with layers in the input table(workstation Libraries). The user can change the visibility right here by activating or deactivating the toggles in the column "Current used activity". The layer settings are visible here all the time and the user is not forced to open the layers library when he needs to change the visibility by layers.
Highlight (=select) entities according to the selected property in the cell
As described on the page selection of members, the user can select all entities with the same property value using input table by one click. This functionality is similar to filtering the 3D model with the Expand selection functionality in the properties panel.

Properties of cross-section in the input table and properties panel
The tab with cross-sections is in the workstation Libraries.
Select the required cross-section in the tab and check all properties in the row. The properties are displayed in the properties panel at the same time so there is no need to open the dialogue. Using the cross-section tab in the input table is much faster.
This is the only way how to display the cross-section properties in the properties panel.
