Mapping tables, mapping rules, dialogue options
The mapping between Revit and SCIA Engineer is based on tables. There are three types of mapping tables – user-defined table, tables based on national codes and mapping rules.
For most standard materials and cross-sections from Revit families, the tables between SCIA Engineer and Revit are implemented. If you are using different families then the standard Revit families, then manual mapping becomes much more necessary. Also families provided by separate Revit dealers are considered as personal families (and not standard families). The upside is that mapping must be done just once for each material and cross-section that must be mapped (since the link stores the mapping in a file).
The next text is about configuring the mapping and can be used on a simple example with a non-standard analytical family. This mapping is always based on the names of materials and cross-sections.
Options
There are several functions which affect what can be transferred to SCIA Engineer.
These functions can be found in the Options dialogue.
Mapping tables
The mapping between Revit and SCIA Engineer is based on tables.
There are three types of mapping tables.
- user-defined table
- tables based on national codes
- mapping rules
There are mapping tables based on national codes and also user defined table in the list.
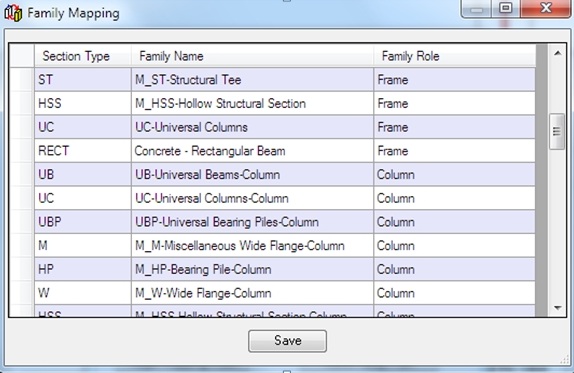
Revit family mapping
The Revit family mapping dialog specifies the mapping of the section types to the Revit family names. This will result in the following procedure:
- An imported (or exported) cross-section will be recognised as a certain section type.
- The ‘Revit family mapping’ will link this section type to a family.
Revit family path
The Revit family path dialogue allows the user to define the path of another Revit family which is saved on the computer. The family mapping configuration (mentioned above) will be able to also look in the folders defined in this setting.
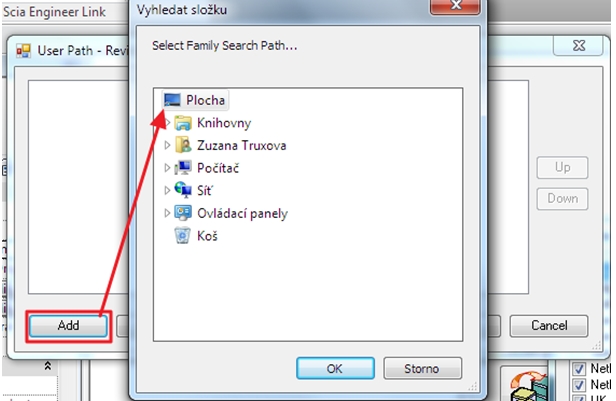
The Revit link needs full read & write rights on this folder, and thus it can also not be set to ‘read-only’.
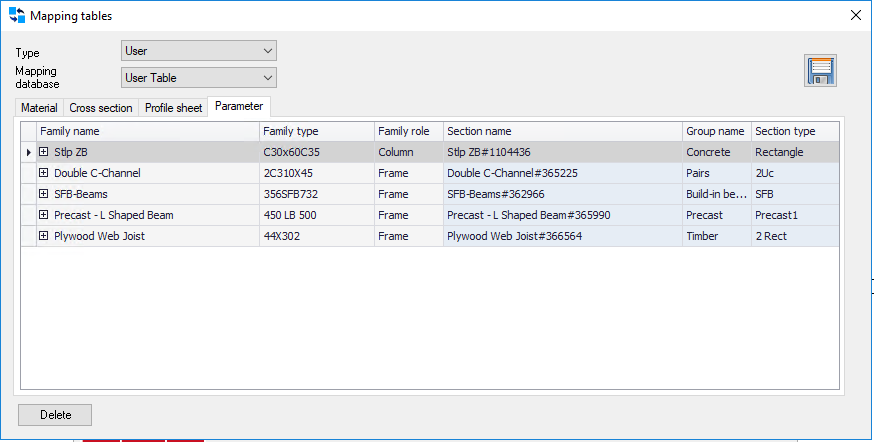
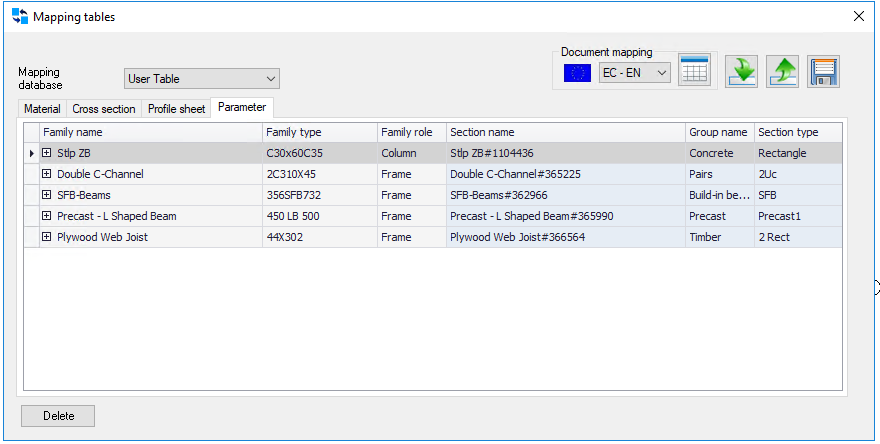
Mapping tables
It is possible to look at the tables (mentioned in the preferred tables) in detail. This is done in a dialog which shows the whole database of mapping. These tables are based on the libraries taken from Revit and SCIA Engineer.
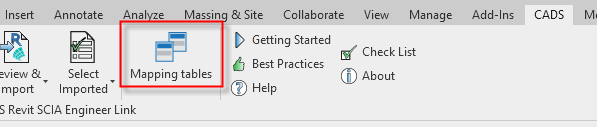
To access them, you can use “Mapping tables” in the options window or "Mapping tables" in the ribbon.
This will result in the following table, where the different tables can be chosen. For each table you will be able to see how different cross-sections (or materials) are mapped.
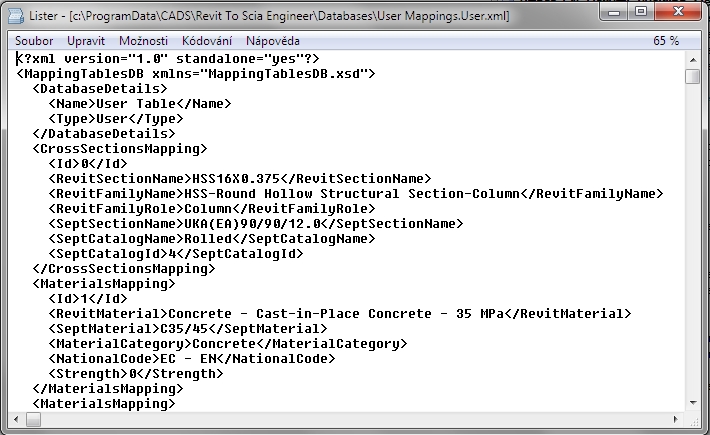
User mapping is saved as XML file (named User Mappings.User.xml) where all mapped cross sections and materials are specified. It can be found on the driver e.g. c:\ProgramData\CADS\Revit To SCIA Engineer\Databases\User Mappings.User.xml.
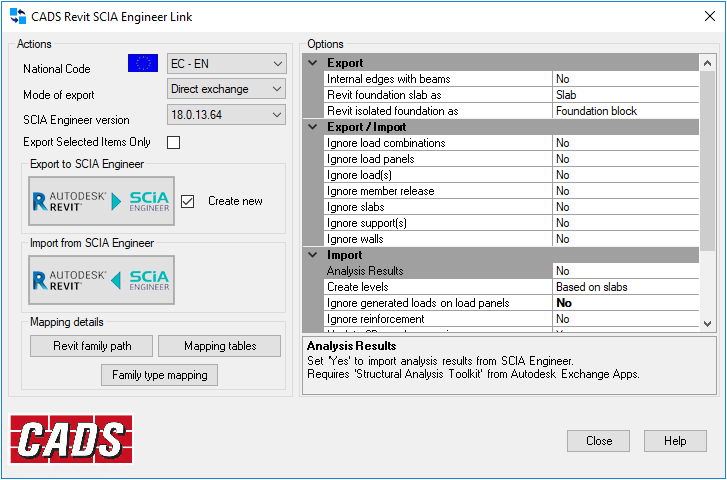
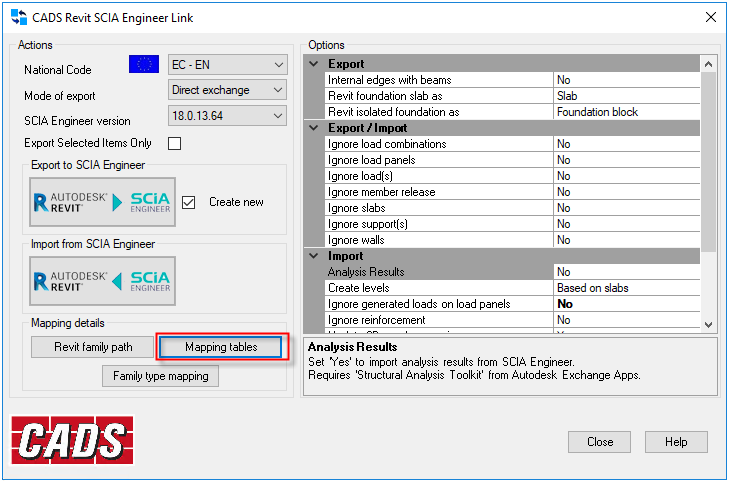
Options dialogue
The following dialog is displayed when the “Options” command has been selected, either from the menu or from the toolbar.

Export/Import part
The Revit link exports structural 1D members and 2D members with openings. The supports can be exported as a Foundation blocks or Standard supports.
The Revit link exports the whole or the selected part of the structure from Revit project.
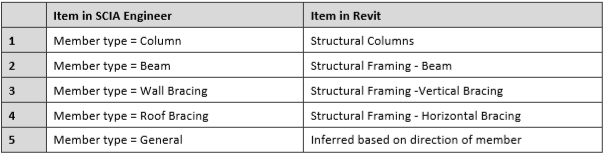
Structural usage from SCIA Engineer can be imported to Revit. It means that Revit recognizes that the element is column, beam or bracing.
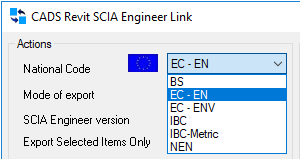
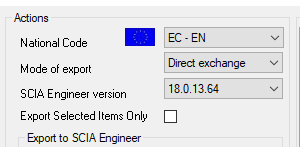
National Code
The national code option specifies which national code is to be used in SCIA Engineer.
The following National codes are supported:
The link program does not validate when the national code used in the Revit template and the national code in the link software are not the same. For example if the user has modelled using the Canadian template and tries to export using the EC-EN national code, the program may not work as expected.
Selection
The options as shown here allow the user to export only the selected members from Revit and to control the behaviour of the import / export.
If this option is selected, the program will expect a partial selection from the user.
Preferences
The following preferences can be set in this dialog.
These options work differently depending on the context in which they are used.
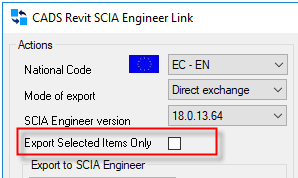
If the model is exported from Revit, the option "Mode of export" to Direct exchange launches SCIA Engineer and exports the model into it.
The option "Mode of export" to File exchange writes the model data as a .R2S file (e.g. model.R2S) which can be opened into SCIA Engineer using the command “Import Revit File.”
This option does not require SCIA Engineer to be installed in the computer and allows sending this file to other users who have installed SCIA Engineer.
If the model is updated from Revit, the option “Mode of export” reads the active SCIA Engineer job and updates the current Revit model.
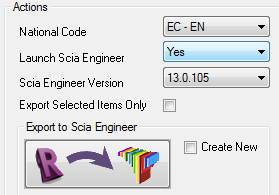
Overwrite
By default the “Export to SCIA Engineer” will overwrite if any existing SCIA Engineer file with the same name is available in the folder.
If you select “Create new”, then the existing SCIA Engineer file with the same name in the folder is deleted and a new SCIA Engineer file is created.

Foundation type
Isolated foundation
It can be exported as standard support or foundation pads to SCIA Engineer.
Foundation slab
There is possible to select the type of foundation plate as:
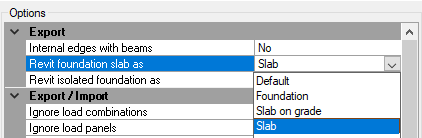
Default - takes the type from the member properties
Foundation - the configuration works only for Revit foundation slabs, then it is exported as foundation
Slab on grade - the member is exported as plate with surface support
Slab - the member is exported as plate
Filter part
There is a possibility to filter what should be exported.
User can export whole structure without load combinations, member releases, slabs or walls, etc.
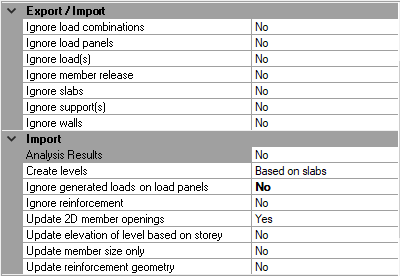
- If the “Ignore load” is set to “Yes”, the loads are not considered for both export and import.
- If the “Ignore load combinations” is set to “Yes”, the loads combinations are not considered for both export and import.
- If the “Ignore load panels” is set to “Yes”, the load panels are not considered for both export and import.
- If the “Ignore member release” is set to “Yes”, member end releases are not considered for both export and import.
- If the “Ignore slabs” option is set to “Yes”, structural slabs are not considered for both export and import.
- If the “Ignore walls” option is set to “Yes”, structural walls are not considered for both export and import.
- The above two options can be used when you want to analyse the frame excluding the slabs and walls.
- If the “Ignore support” option is set to “Yes”, the boundary conditions are not considered for both export and import.
- If the “Analysis Results” option is set to “No”, no results from SCIA Engineer are imported to Revit.
- If the “Ignore generated load on load panels” option is set to “Yes”, no generated load from load panels is imported to Revit.
- If the “Ignore reinforcement” option is set to “Yes”, no reinforcement from SCIA Engineer is imported to Revit.
- If the “Update 2D member openings” option is set to “No”, openings will not be updated in Revit.
- If the “Update member size only” option is set to “Yes”, only profiles, materials, thickness and profiled sheets are updated in Revit.
- If the “Update reinforcement geometry” option is set to “Yes”, the reinforcement geometry is updated if possible.
- The “Create levels” option defines how levels in Revit are created - is set to “Yes”, the reinforcement geometry is updated if possible.
- If the “Update elevation of level based on storey” option is set to “Yes”, elevation is updated in Revit.
Note: All types of practical reinforcement (i.e. old and new REDES for beams, 2D reinforcement for slabs and free bars) are supported for import to REVIT.
User mapping part
Following user mapping options makes the export option easier when suitable cross section or material is not found for majority of members, but the export is needed without any prompts for mapping with an automatic mapping as unknown sections or materials.

If the ‘Material as Unknown’ is set to Yes, the program will not prompt the user for mapping a material whenever a material is not found in the map database.